


Introduction
If you’ve ever built web applications using traditional frameworks like ASP.NET Web Forms or MVC, the idea of switching to a JavaScript-based frontend library like React might seem both exciting and intimidating. I’ve been there myself. Coming from a .NET background, I was used to tools like Visual Studio, server-side rendering, and component drag-and-drop interfaces. But as modern web development continues to shift toward rich, interactive user experiences, React has become one of the most in-demand and powerful tools to master.
In this blog post, I want to help you get started with React — not from a purely academic point of view, but from the perspective of someone who’s already familiar with the basics of software engineering and is transitioning into the frontend space.
We’ll go over:
- What React is and why it’s so widely used.
- How to set up a simple React app (with screenshots).
- The key concepts that power React: components, props, and state.
- What makes React unique and worth learning.
I’ll keep the explanations clear and beginner-friendly, but not oversimplified. Whether you’re coming from a .NET background like me or just starting out in frontend development, you’ll walk away with a solid foundation and a working app by the end of this series.
In the next post, we’ll build a small Todo app from scratch and deploy it online using Netlify — but for now, let’s lay the groundwork.
What is React and Why Use It?
At its core, React is a JavaScript library for building user interfaces, developed and maintained by Facebook (now Meta). But it’s more than just a library — it’s a way of thinking about UI design that breaks away from the traditional page-based model and embraces components, state, and reusability.
Think of React like a box of LEGO blocks — each block represents a component, a small, reusable piece of your app’s interface. Just like LEGO bricks, these components can be combined to build complex dashboards, forms, menus, or any part of a web page.
So… what makes React different?
– Component-Based & Reusable: Build your UI from small pieces (components) that you can reuse anywhere. This saves time and keeps your code clean.
– Virtual DOM: To understand this, let’s quickly explain what the DOM (Document Object Model) is. The DOM is basically the structure of your web page — think of it as a tree that represents every element like buttons, text, images, etc. When you update something on the page, the browser has to carefully change this tree, which can sometimes be slow.
React uses a Virtual DOM, which is like a lightweight copy of the real DOM. When something changes in your app, React first updates the Virtual DOM, compares it to the previous version, figures out the exact parts that changed, and then efficiently updates only those parts in the real DOM. This makes your app faster and more efficient.
– Declarative: Instead of telling the browser every tiny step of how to update the page, you describe what the UI should look like based on your data, and React figures out the rest.
React and the Web Today: SPA, CSR, and SSR
React is mainly used to build Single Page Applications (SPA) — apps that load once and update dynamically without refreshing the whole page. This creates smoother and faster user experiences.
- Client-Side Rendering (CSR): React builds the UI in the browser, letting users interact immediately.
- Server-Side Rendering (SSR): Sometimes parts of the app are built on the server first, which helps with performance and SEO.
We’ll keep these concepts light for now — you’ll see how they come into play as we build and explore React apps.
A Simple React Component Example
Here’s what a basic React component looks like in JSX (a special syntax that mixes HTML and JavaScript):
function Welcome() {
  return <h1>Hello, welcome to React!</h1>;
}
This function defines a component called Welcome that displays a greeting. We’ll use components like this as the building blocks for our app.
React Components, Props, State, Hooks, and JSX
3.1 JSX – The Language of React Components
JSX (JavaScript XML) is a syntax extension for JavaScript that looks a lot like HTML. It’s how we tell React what the UI should look like.
Although JSX looks like HTML, under the hood it’s transformed into JavaScript using React.createElement. This means you can write markup-like code directly in your JavaScript files, making components more readable and maintainable.
Basic JSX example:
const element = <h1>Hello, React!</h1>;Here, we’re creating a React element that renders an <h1> tag.
Key JSX Rules:
- You must return a single parent element (use fragments
<> </>or a wrapper div). - JavaScript expressions can be embedded using
{}. - Use
classNameinstead ofclass, andhtmlForinstead offor. - All self-closing tags must end with
/>like<img />.
Example with JavaScript inside JSX:
const name = "Sara";
const element = <p>Hello, {name}!</p>;
JSX is at the core of every React component, and you’ll see it used throughout all our example projects — including the weather app and todo app.
3.2 Components – Building Blocks of a React App
In React, components are the core units of your application. They allow you to break down complex UIs into smaller, reusable pieces — just like LEGO blocks.
There are two main types of components:
Functional Components (Modern, Recommended)
These are simple JavaScript functions that return JSX. They’re lightweight, easy to read, and work well with React Hooks.
Example:
function Greeting() {
  return <h2>Welcome to my blog!</h2>;
}
Or using arrow function syntax:
const Greeting = () => <h2>Welcome to my blog!</h2>;We’ll use functional components in both the weather app and the todo app.
Class Components (Older, Less Common Now)
These use ES6 classes and have more boilerplate. While still supported, most new apps favor functional components with hooks.
Example:
class Greeting extends React.Component {
  render() {
    return <h2>Hello, world!</h2>;
  }
}
Why Components Matter
- Reusability: Define a component once, use it anywhere.
- Separation of concerns: Keep structure and behavior together in small, logical units.
- Maintainability: Easier to test and manage as your app grows.
3.3 Props – Passing Data Between Components
In React, Props (short for properties) are the way components communicate with each other. If a component is like a function, then props are its arguments.
They allow parent components to pass data down to child components, making your UI flexible and dynamic.
What Are Props?
You can think of props as data packages sent from one component to another. A parent component can send information like this:
function Welcome(props) {
  return <h1>Hello, {props.name}!</h1>;
}

function App() {
  return <Welcome name="Ahmed" />;
}- Here, the
Appcomponent sends anameprop with the value"Ahmed"to theWelcomecomponent. - Inside
Welcome, we access that value usingprops.name.
Why Are Props Useful?
Props are read-only and are essential for:
- Reusing components with different data
- Building UI hierarchies (top-down)
- Keeping components pure and predictable
You’ll use props constantly when:
- Displaying lists of items
- Customizing UI components (like passing in a label or an icon)
- Sharing values from parent to child components
3.4 State and useState – Making Components Dynamic
In React, state is what allows your components to become dynamic and interactive. But why does state exist at all?
Why Was State Introduced?
Before tools like React, web pages were mostly static or required full-page reloads to update. Traditional server-rendered pages had to request the whole page from the server again for even small changes, like clicking a “like” button.
React introduced client-side rendering (CSR) — meaning the app runs in the browser and updates views without reloading the entire page. To make this possible, components need a way to “remember” things and re-render only parts of the UI.
That’s where state comes in — it’s the key to React’s interactivity.
What Is State?
State is data that lives inside a component and changes over time. React uses this state to reactively re-render the component when the data changes.
Think of it like a memory inside each component. It holds whatever values your UI depends on: input fields, toggles, fetched data, etc.
In modern React, we use the useState Hook to create and manage state.
useState in Action
Here’s a basic example of a counter:
import React, { useState } from 'react';

function Counter() {
  const [count, setCount] = useState(0);

  return (
    <div>
      <p>You clicked {count} times.</p>
      <button onClick={() => setCount(count + 1)}>
        Click me
      </button>
    </div>
  );
}countis the current state value.setCountis the function to update it.useState(0)sets the initial value to0.
Clicking the button updates the state and triggers a re-render — no page reload, no manual DOM manipulation. Just smooth updates.
When and Where Will We Use It?
State is used whenever your component needs to reflect changing data, such as:
- User input in a search field
- Toggling themes or menus
- Managing a to-do list (add/remove items)
- Storing fetched data like weather or news
👉 In upcoming tutorials:
- We’ll use
useStatein the Weather App to store and update weather data. - We’ll also use it in the Todo App to manage tasks dynamically.
3.5 Hooks – Adding Superpowers to Your Components
In modern React, Hooks are special functions that allow you to manage a component’s internal logic — like remembering values, reacting to changes, or accessing shared data — without writing extra boilerplate.
Think of Hooks as power tools that add superpowers to your functional components — things like memory, lifecycle control, context access, and more.
What Are Hooks?
Hooks are just functions that start with the word use. The two most common ones are:
useState– lets your component remember and update values (which we just used)useEffect: allows you to perform side effects like fetching data or syncing with local storage.
Other built-in Hooks include:
useContext: helps you share data (like themes or auth info) globally without passing props manually.
There are more built-in hooks like useRef, useReducer, and you can even create your own custom hooks — but we’ll get there in later posts.
Example: useEffect
While useState manages data, useEffect lets you perform side effects — like fetching data, setting up subscriptions, or manually updating the DOM.
Here’s a simple example that runs code when the component mounts:
import React, { useEffect, useState } from 'react';

function WeatherInfo() {
  const [city, setCity] = useState("Warsaw");

  useEffect(() => {
    console.log(`Fetching weather for ${city}`);
    // Imagine an API call here
  }, [city]); // <- Runs every time 'city' changes

  return (
    <div>
      <button onClick={() => setCity("Krakow")}>Change City</button>
    </div>
  );
}- The code inside
useEffectruns after the render. - The dependency array
[city]tells React to re-run this effect whenevercitychanges. - No infinite loops — React is smart enough to manage the lifecycle for you.
Where Will You See These Hooks in Action?
You’ll see all of these hooks in real-world usage in our upcoming tutorials:
- In the Todo List App (next post):
useState,useContext, anduseEffectto manage and persist tasks using local storage.
- In the Weather App:
useStateanduseEffectto handle city searches and fetch current weather data from an API.
So don’t worry if this feels abstract — we’ll walk through each one step by step in practical examples. You’ll see how these hooks are applied in full projects, complete with code and screenshots.
4. Setting Up Your First React App
Before we start coding, you’ll need to have Node.js and npm (Node Package Manager) installed on your computer. These tools help you manage libraries and run your React app locally.
If you haven’t installed them yet, you can download Node.js (which comes bundled with npm) from nodejs.org.
Once installed, open your terminal or command prompt and run the following commands to check your installations:
node -v
npm -v
Create a New React App
React provides a simple way to bootstrap a new project using Create React App, a tool that sets up all the boilerplate configuration for you.
Run this command in your terminal:
npx create-react-app my-first-react-appThis will create a new folder named my-first-react-app with everything you need to get started.
Explore the Project Structure
the next step is to open this folder in a code editor. While you can use any text editor, Visual Studio Code (VS Code) is highly recommended for React development because it provides helpful features like syntax highlighting, auto-completion, debugging tools, and a rich ecosystem of extensions tailored for JavaScript and React.
from within your project folder in the terminal. This command launches VS Code with your React project loaded.
To open your project in VS Code, you can run:
code .Inside the folder, you’ll find:
public/— static files like the main HTML templatesrc/— where your React components and styles livepackage.json— manages project dependencies and scripts
Here’s a screenshot showing what your React project looks like opened in VS Code:
Take some time to explore the folders and files. The src folder is where most of your React code will live — it contains your components, styles, and main application logic.
Run Your React App Locally
Navigate into your project folder and start the development server:
my-first-react-app
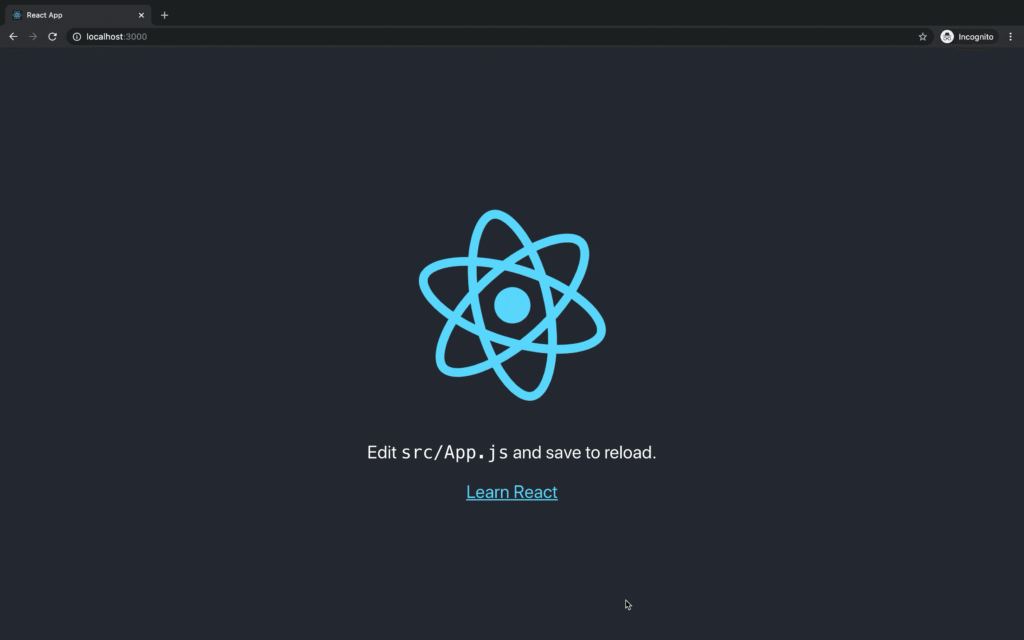
npm startYour browser will automatically open http://localhost:3000, showing the default React welcome page.
Add Screenshot 4 here: Browser displaying the default React welcome page at localhost:3000.
Next Steps: Replace App.js with Your Own Component
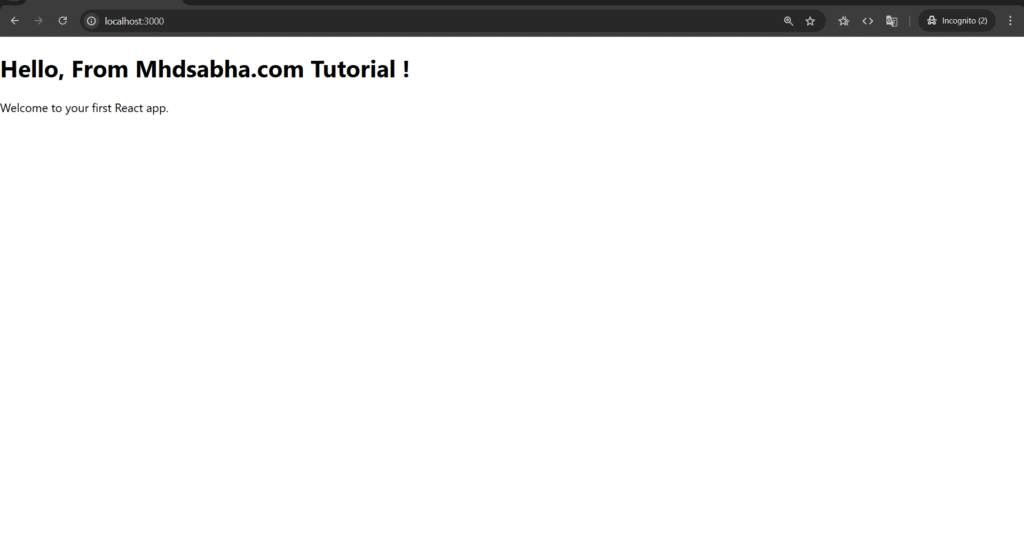
Now that you have your React app running, open the project in your favorite code editor and start editing the src/App.js file.
Try changing the default content inside the <div className="App"> to something simple like:
function App() {
  return (
    <div>
      <h1>Hello, From Mhdsabha.com Tutorial !</h1>
      <p>Welcome to your first React app.</p>
    </div>
  );
}
export default App;
Save the file and watch your browser update instantly, thanks to React’s live reloading!
Conclusion
React is a powerful and flexible library that makes building modern web interfaces easier and more efficient. By breaking your UI into small, reusable components, leveraging JSX for clear structure, and managing state and props effectively, you can create interactive and dynamic applications with confidence.
In this post, we introduced you to the core concepts of React, including what React is, how to set up your project, and the basics of JSX, components, state, hooks, and props. These fundamentals form the foundation for building scalable React apps.
As you continue learning, don’t hesitate to experiment with these concepts in your own projects. In the next post, we’ll dive deeper into a practical example by building a Todo app from scratch — covering all the steps, important code snippets, and how we manage state and context. You’ll also find links to the complete code repository and a live demo to try out yourself.
Stay tuned, and happy coding! See you in the next post.


Switching from traditional frameworks to React can indeed feel like a big leap, especially for developers comfortable with tools like Visual Studio. React’s focus on building interactive user experiences is a game-changer in modern web development. This post does a great job of easing the transition by focusing on practical steps rather than abstract concepts. It’s reassuring to see guidance tailored for those with existing software engineering knowledge. How does React’s component-based approach compare to the server-side rendering you’re used to in .NET.