
Now that we’ve explored the fundamentals of React, it’s time to apply those concepts in a real-world project. A weather app is a perfect next step — simple enough to stay approachable, yet full of opportunities to practice key React skills. Together, we’ll work with real-time data, manage multiple pieces of state, handle user input, and dynamically render the UI based on API responses.
In this post, we’ll build a complete weather application using React and the OpenWeatherMap API. Along the way, we’ll dive into essential React patterns like useState, useEffect, controlled components, and conditional rendering. By the end, we’ll have a functional app that not only works but also deepens our understanding of how React handles data.
Let’s get started.
1. Why a Weather App?
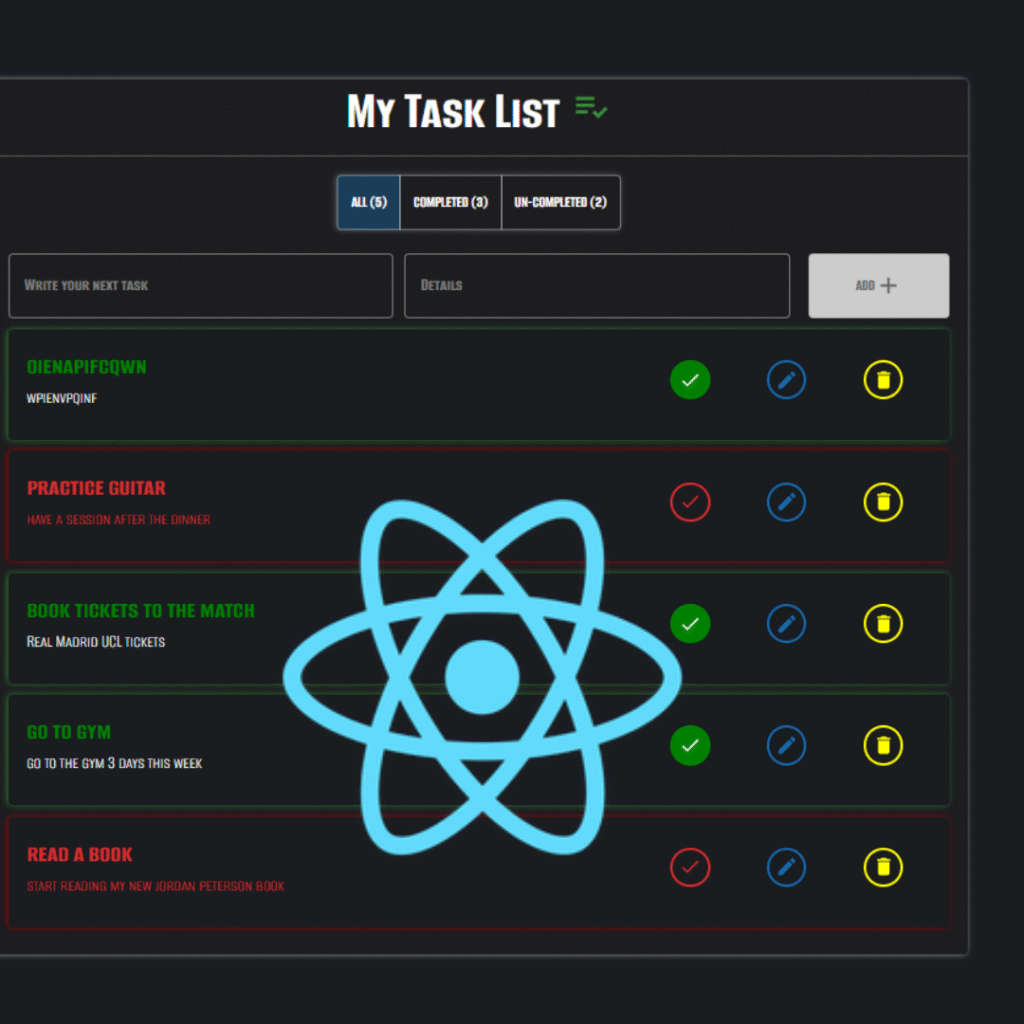
After building the Todo app, we’ve gotten comfortable with handling state, managing user input, and rendering dynamic lists — all fundamental skills in React. Now, it’s time to take things a step further with a project that introduces new challenges while reinforcing those basics.
A weather app is the perfect choice because it allows us to work with external data from an API, which brings us closer to real-world applications. Instead of managing static or user-generated data like in the Todo app, we’ll fetch and display live weather information that updates based on user searches or quick-select buttons.
This project helps us practice important React patterns like asynchronous data fetching, handling loading and error states, and conditional rendering — concepts that are essential for building responsive and user-friendly apps. Additionally, by working with the OpenWeatherMap API, we learn how to integrate third-party services, a skill that will be valuable in many future projects.
In short, the weather app is a natural progression: it builds on what we already know while opening doors to new techniques, making it a meaningful and practical next step in our React journey.
2. Project Overview
By the end of this section, we’ll have a clear understanding of what the app does and how its parts fit together before diving into the code.
In this project, we’ll build a weather application with several key features designed to give us practical experience working with React and APIs:
- Search by city: Users can type in any city to get the current weather and a 5-day forecast.
- Quick-select city buttons: Convenient buttons let us instantly check popular cities without typing.
- Current weather display: Shows temperature, weather conditions, humidity, wind speed, and an icon.
- 5-day forecast: Displays daily weather summaries to help users plan ahead.
- Loading and error handling: Provides feedback while data is being fetched or if something goes wrong.
For the tech stack, we’ll use:
- React functional components with hooks like
useStateanduseEffectto manage state and side effects. - Bootstrap for responsive layout and basic styling.
- OpenWeatherMap API as our external data source for weather information.
3. Setting Up the Project
Before diving into the code, let’s set up our React project environment.
First, create the project with Create React App:
npx create-react-app react-weather-app
cd react-weather-app
npm start
To add Bootstrap for styling, include this CDN link in your public/index.html file inside the <head> tag:
<link href="https://cdn.jsdelivr.net/npm/bootstrap@5.3.5/dist/css/bootstrap.min.css"  rel="stylesheet"
  integrity="sha384 SgOJa3DmI69IUzQ2PVdRZhwQ+dy64/BUtbMJw1MZ8t5HZApcHrRKUc4W0kG879m7"
  crossorigin="anonymous"/>
Next, get your OpenWeatherMap API key by signing up here.
For this project, place the API key directly in your App.js file as a constant:
const API_KEY = "YOUR_API_KEY_HERE";Note: In real-world projects, it’s important to keep API keys secure using environment variables or backend proxies.
With this setup complete, we’re ready to start coding the weather app!
4. Fetching Weather Data and Managing State
At the core of our weather app is fetching live data from the OpenWeatherMap API and managing how that data flows through our application. To do this, we declare several pieces of state using React’s useState hook:
weatherDataholds the current weather details for the selected city.forecaststores the 5-day weather forecast information.loadingtracks whether data is currently being fetched, allowing us to display a loading spinner.errorcaptures any error messages if the fetch operation fails.citykeeps track of the city the user wants to view weather for.searchInputmanages the value of the text input where users type their city name.
These states are essential because they control what the user sees and how the app responds to their interactions.
Here’s the code snippet with comments explaining these states and the function that fetches the weather data:
// State declarations to manage data and UI states
const [weatherData, setWeatherData] = useState(null); // Holds current weather data
const [forecast, setForecast] = useState([]);         // Holds 5-day forecast data
const [loading, setLoading] = useState(false);        // Tracks loading state
const [error, setError] = useState(null);             // Holds error messages (if any)
const [city, setCity] = useState("krakow");           // Current city for which to fetch data

// Function to fetch current weather and forecast data from the OpenWeatherMap API
const fetchWeatherData = async (cityName) => {
  try {
    setLoading(true); // Show loading spinner

    // Fetch current weather data for the given city
    const response = await fetch(
      `https://api.openweathermap.org/data/2.5/weather?q=${cityName}&appid=${API_KEY}&units=imperial`
    );
    const data = await response.json();
    setWeatherData(data); // Store current weather data

    // Fetch 5-day weather forecast data
    const forecastResponse = await fetch(
      `https://api.openweathermap.org/data/2.5/forecast?q=${cityName}&appid=${API_KEY}&units=imperial`
    );
    const forecastData = await forecastResponse.json();

    // Filter forecast data to get one entry per day (every 8th item)
    const dailyForecast = forecastData.list.filter((item, index) => index % 8 === 0);
    setForecast(dailyForecast); // Store filtered forecast data

    setError(null); // Clear previous errors if successful
  } catch (error) {
    setError("Couldn’t fetch data, please try again."); // Show error message on failure
  } finally {
    setLoading(false); // Hide loading spinner
  }
};
The main function, fetchWeatherData, does two things:
- It fetches the current weather for the selected city.
- It also fetches the 5-day forecast data.
Both API calls use async/await for cleaner asynchronous code. To display only one forecast reading per day (instead of every 3 hours), we filter the forecast data using index % 8 === 0 since the API returns data in 3-hour intervals (8 per day).
To trigger this data fetching, we use React’s useEffect hook, which lets us perform side effects in functional components. Specifically, we want to fetch new weather data every time the city state changes. This is similar to what we practiced in the Todo app where useEffect was used to sync data with local storage — here, we’re applying the same pattern to handle an API request instead.
useEffect(() => {
  fetchWeatherData(city);
}, [city]);
By combining useState and useEffect, we can react to changes in state and run necessary side effects, keeping our UI in sync with the underlying data.
5- Rendering the UI
With the data fetched and stored in state, the next step is to render the weather app’s interface dynamically based on that data and the app’s current state.
5.1 Conditional Rendering
React’s power lies in rendering UI conditionally — showing or hiding parts of the interface depending on the situation. In our app, we handle three main conditions by using three states as follows : loading, error, and weatherData to control what the user sees.
loadingistruewhile the app is waiting for data. During that time, we show a loading spinner and message.
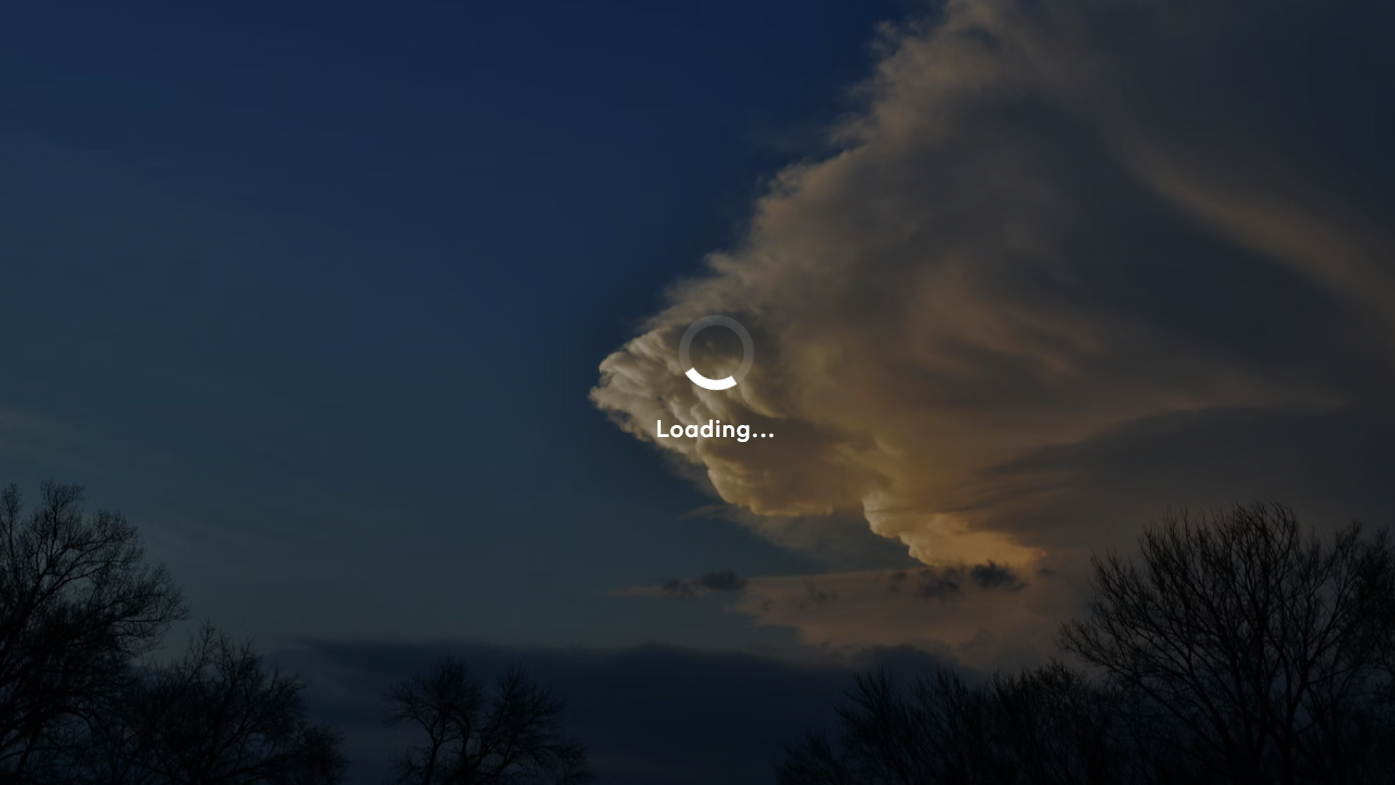
Loading state with spinner shown during data fetch.
errorholds any error messages that result from a failed API request. If there’s an error, we display a helpful message.
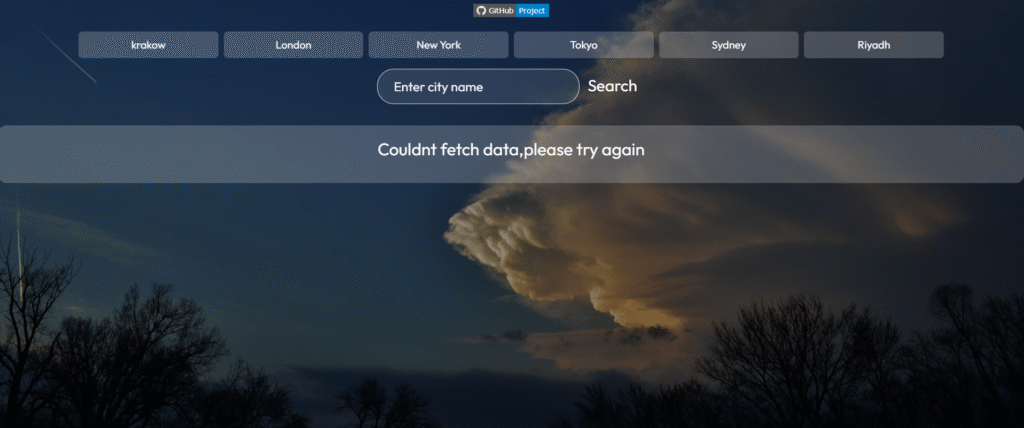
Error state displayed when the API call fails or an invalid city is searched, providing clear feedback to the user.
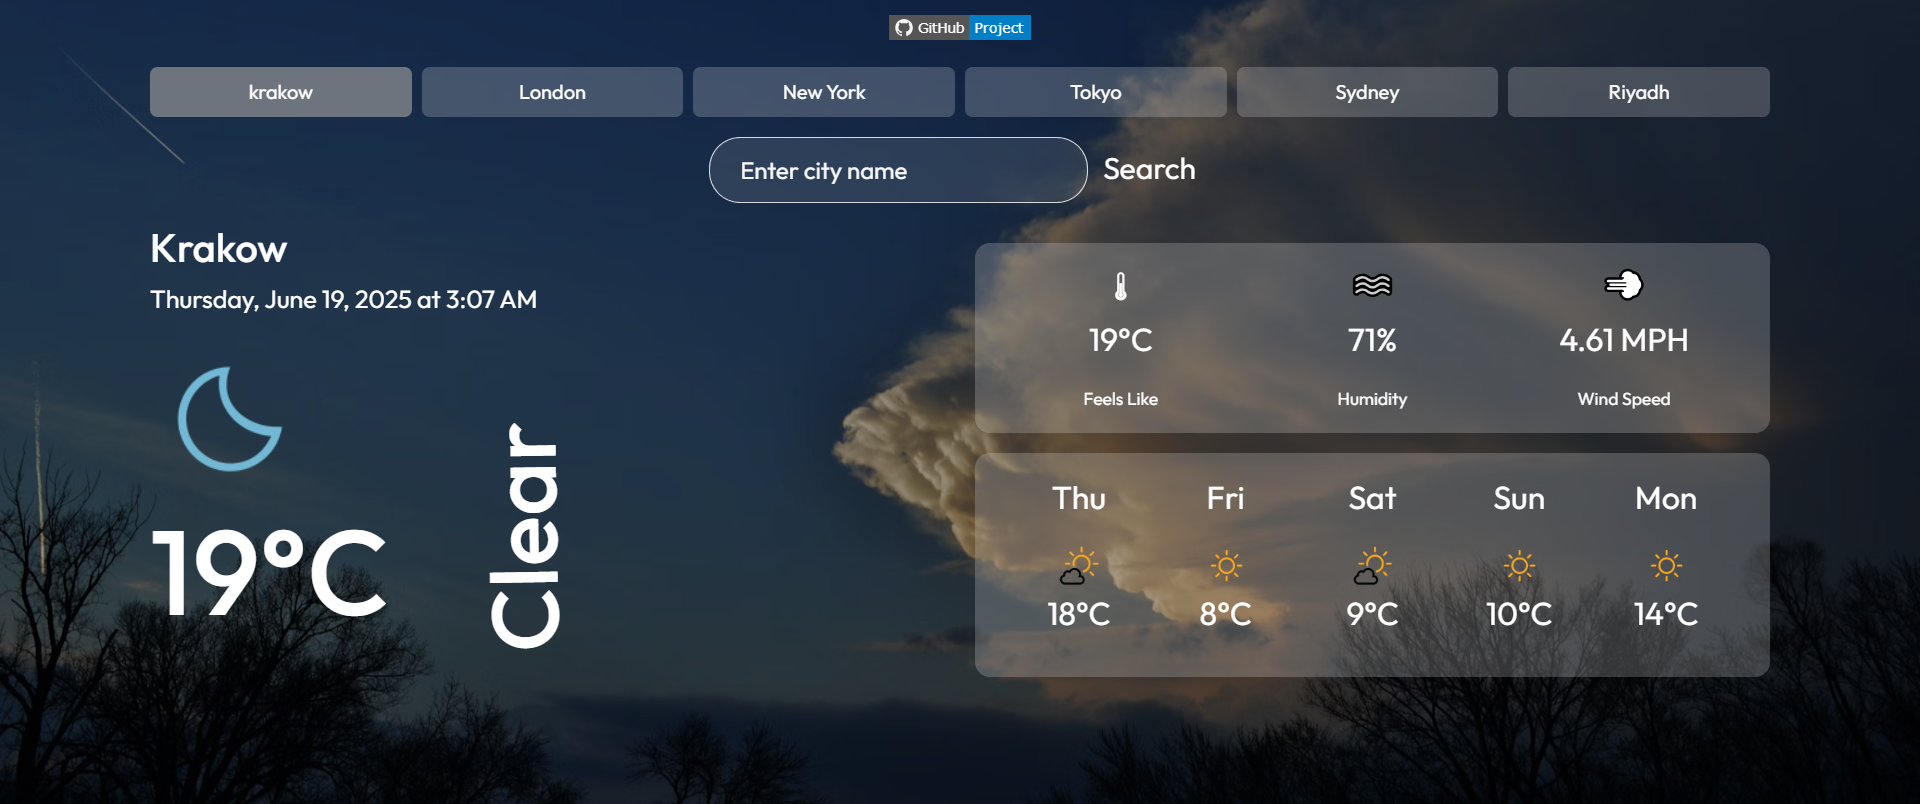
weatherDatadetermines whether we should display the weather results at all — we only show the main content when data exists.

Weather app displaying current conditions and 5-day forecast after successfully fetching data — no loading or errors present.
This approach ensures the user always sees relevant information and feedback about what’s happening.
if (loading) {
  return (
    <div className="loading-screen">
      <div className="spinner"></div>
      <p>Loading...</p>
    </div>
  );
}

if (error) {
  return (
    <div className="error-message">
      <p>{error}</p>
    </div>
  );
}5.2 Displaying Current Day Weather Data
Once the weather data has been fetched and stored in state, we display the current weather alongside additional details like humidity, wind speed, and how it feels outside. But before we render anything, we include a defensive check:
{weatherData && weatherData.main && weatherData.weather && (
  <div className="weather-details">
  // Only render this block if we have all the required weather data
    {/* Weather info goes here */}
  </div>
)}
This conditional prevents the app from attempting to read undefined properties during the initial render or when the API request fails. It’s a small but important guard that improves the app’s reliability and user experience.
Here’s the full structure for rendering the current weather section:
<div className="container">
  <div className="row">
    {/* Left Column: City, Date, Weather Icon, Temperature, Description */}
    <div className="col-md-6 mb-4">
      <h2>{weatherData.name}</h2>
      <div className="location">
        <p style={{ fontSize: "20px" }}>
          {new Date(weatherData.dt * 1000).toLocaleString("en-US", {
            dateStyle: "full",
            timeStyle: "short",
          })}
        </p>
      </div>
      <img
        className="weather-icon"
        src={`icons/${weatherData.weather[0].icon}.png`}
        alt="weather"
      />
      <h1>{Math.round((weatherData.main.temp - 32) * (5 / 9))}°C</h1>
      <div className="description">
        <h1 style={{ fontSize: "75px" }}>
          {weatherData.weather[0].main}
        </h1>
      </div>
    </div>

    {/* Right Column: Feels Like, Humidity, Wind Speed */}
    <div className="col-md-6">
      <div className="currentweather row text-center">
        <div className="col-4">
          <h3>🌡</h3>
          <p>{Math.round((weatherData.main.feels_like - 32) * (5 / 9))}°C</p>
          <small>Feels Like</small>
        </div>
        <div className="col-4">
          <h3>🌫️</h3>
          <p>{weatherData.main.humidity}%</p>
          <small>Humidity</small>
        </div>
        <div className="col-4">
          <h3>💨</h3>
          <p>{weatherData.wind.speed} MPH</p>
          <small>Wind Speed</small>
        </div>
      </div>
    </div>
  </div>
</div>
This structure reflects how each UI element is directly tied to a piece of state:
weatherData.name→ city nameweatherData.dt→ current timestampweatherData.main.temp→ temperatureweatherData.weather[0].main→ weather condition (e.g., “Clouds”)weatherData.main.feels_like,humidity,wind.speed→ detailed metrics
By connecting these pieces to state, we ensure the UI updates automatically whenever the user performs a new search or selects a quick city button.
5.3 Displaying the 5-Day Forecast
Once we’ve shown the current weather, we move on to displaying the 5-day forecast. This data is stored in the forecast state, and we render it using .map() — just like we did in the Todo app to list tasks. But before we render anything, we include a key check:
{forecast.length > 0 && (
  <div className="container mt-4">
    <h3>5-Day Forecast</h3>
    <div className="row justify-content-center">
      {forecast.map((item, index) => (
        <div key={index} className="col-md-2 col-6 mb-3 text-center">
          <p>
            {new Date(item.dt * 1000).toLocaleDateString("en-US", {
              weekday: "short",
              month: "short",
              day: "numeric",
            })}
          </p>
          <img
            src={`icons/${item.weather[0].icon}.png`}
            alt="forecast-icon"
            style={{ width: "50px" }}
          />
          <p>{Math.round((item.main.temp - 32) * (5 / 9))}°C</p>
          <p style={{ fontSize: "14px" }}>{item.weather[0].main}</p>
        </div>
      ))}
    </div>
  </div>
)}How It Works
- We use
.map()to loop through theforecastarray and render a card for each day. - The
key={index}ensures React can track each element in the list efficiently. - Each card shows:
- The day and date.
- A weather icon based on the forecast.
- The temperature, converted from Fahrenheit to Celsius.
- A short description like “Rain” or “Clear”.
Why We Check forecast.length > 0
We include this conditional check to make sure we only attempt to render the forecast section if forecast data actually exists. Without it, we could run into rendering errors or display an empty UI section while the data is still being fetched. It’s a simple but powerful way to control what the user sees based on the application’s state.
Reinforcing React Principles
This part of the app reinforces a core React idea: the UI reflects the current state. When the forecast array updates (after a successful API call), React automatically re-renders the relevant part of the UI. No manual intervention needed — and that’s the beauty of component-driven stateful UI.
5.4 Dynamic Buttons and Search Input
To make it easy for users to quickly check the weather in popular cities or search for any city they want, we provide two ways to select a location:
- Quick-select buttons for a few predefined cities, so users can instantly get weather data with a single click.
- A search form where users can type the name of any city and submit to fetch its weather.
This approach balances convenience with flexibility, and it also helps us practice handling user events, controlled inputs, and dynamic data fetching in React. Below is the implementation of these features, including the event handlers that keep everything interactive and responsive.
{/* Quick-select city buttons */}
<div className="container mt-2">
  <div className="row gx-2 gy-2 justify-content-center">
    {["krakow", "London", "New York", "Tokyo", "Sydney", "Riyadh"].map((cityName) => (
      <div key={cityName} className="col-5 col-sm-4 col-md-3 col-lg-2">
        {/* When clicked, fetch weather data for the selected city */}
        <button
          onClick={() => fetchWeatherData(cityName)}
          className={`btn w-100 city-btn ${city === cityName ? "active" : ""}`}
        >
          {cityName}
        </button>
      </div>
    ))}
  </div>
</div>

{/* Search form for typing a custom city */}
<div className="search">
  <form onSubmit={handleSearch} className="form">
    {/* Controlled input bound to searchInput state */}
    <input
      type="text"
      value={searchInput}
      onChange={(e) => setSearchInput(e.target.value)}
      placeholder="Enter city name"
      className="search-input"
    />
    {/* Submit button triggers handleSearch which fetches data */}
    <button type="submit" className="search-btn">
      Search
    </button>
  </form>
</div>
This function handles the form submission event when a user searches for a city:
function handleSearch(e) {
  e.preventDefault();             // Prevents the default browser refresh on form submit
  fetchWeatherData(searchInput);  // Calls the API fetch function with the current input value
  setSearchInput("");             // Clears the input field after submitting
}
How It Works: Step-by-Step
- Quick-select City Buttons
- We render a list of city buttons using
.map(). Each button displays a city name from a predefined array. - When a user clicks on a button, it calls the
fetchWeatherDatafunction with that city’s name as an argument. - The
fetchWeatherDatafunction updates thecitystate and triggers the API call to fetch the weather data for the selected city. - We also add an
"active"CSS class to the button if it matches the currentcitystate, providing visual feedback on which city is selected.
- We render a list of city buttons using
- Controlled Search Input
- The search input field is a controlled component, meaning its value is tied directly to the
searchInputstate. - Every time the user types in the input, the
onChangeevent updates thesearchInputstate with the new value. - This keeps the React state and input field in sync, making it easier to work with the input value programmatically.
- The search input field is a controlled component, meaning its value is tied directly to the
- Handling the Search Submission
- The search form listens for the
onSubmitevent, which is triggered when the user presses Enter or clicks the Search button. - When submitted, it calls the
handleSearchfunction. - Inside
handleSearch, we prevent the default form submission behavior to avoid page reload. - Then, we call
fetchWeatherDatawith the currentsearchInputvalue to fetch weather data for the typed city. - Finally, we clear the
searchInputstate to reset the input field for the next search.
- The search form listens for the
6. Styling and Responsiveness
For this project, Bootstrap is used to quickly create a responsive grid layout that works well across different device sizes. Custom CSS adds final touches to improve readability and visual appeal.
The goal here is to keep styling simple so we can concentrate on learning core React concepts like state, effects, and conditional rendering. While this means the design isn’t fully polished, it’s functional and responsive enough for most screens.
In upcoming posts, we’ll explore how to enhance styling and user experience with more advanced CSS techniques, themes like dark mode, and responsiveness best practices. For now, this basic styling helps us focus on the heart of React development without getting distracted by design details.
7. Why This Project Lives in One File — And What’s Next
In the previous Todo app project, we practiced breaking the UI into separate components to keep our code organized and reusable. Componentization is a fundamental React skill that helps maintain clarity and scalability.
For this weather app, however, we intentionally kept all the code in a single file, App.js. This choice was made on purpose — to invite curiosity and encourage us to explore the code closely and ask ourselves: Where are the components? Why didn’t we create separate ones here?
This kind of self-questioning is important. It prompts us to think critically about project structure and when it makes sense to split things up. By seeing everything together, we get a clearer picture of how state, effects, UI, and logic interplay in React before moving on to more complex patterns.
That said, as the project grew, I started to notice that:
- The file became long and harder to scan.
- Reusable UI blocks like the forecast cards or search form could be better organized.
- Breaking the app into components would make the code more maintainable and testable.
If I were to refactor this app (or build a similar one in the future), it would make sense to split it into smaller components such as:
<SearchBar />for the input and search logic<CityButtons />for the quick access city list<CurrentWeather />for displaying main weather details<ForecastDay />for each forecast card
For now, keeping everything in one place helps keep our focus sharp on mastering core React concepts — a foundation that prepares us for more modular and sophisticated apps down the road.
8. See It In Action
Now that we’ve covered the core features and UI rendering, let’s see how the app performs in a real scenario. You can try searching for different cities or clicking the quick-select buttons to fetch weather data dynamically.
If you want to explore the code and test it yourself, check out the GitHub repository here:
React Weather App on GitHub
You can also try the live demo here:
Live Demo – React Weather App
Here’s a quick demo of the app fetching weather data and updating the UI dynamically.
Try typing a city name or selecting one of the buttons above and watch the app update in real time!
Conclusion
In this project, we built a fully functional weather app that demonstrates key React concepts such as state management, conditional rendering, and handling asynchronous API calls. Through integrating current weather data and a 5-day forecast, the app provides a practical example of how to fetch, process, and display real-time data dynamically.
While the app currently keeps all logic in a single file for simplicity, it lays a solid foundation for further enhancements, including breaking down the UI into reusable components and improving user experience with advanced features like autocomplete and better error handling.
I hope this walkthrough inspires you to build your own React projects and explore ways to organize and optimize your code for scalability and maintainability.
Happy coding!