
Welcome back to this tutorial series on building a RESTful API with Node.js and Express! In Part 1, we set up the development environment, created a basic Express server, explored middleware essentials, and handled routing with dynamic parameters and query strings.
Now, in Part 2, we’ll dive deeper. We’ll cover essential error handling techniques to make your API robust, learn how to organize your code into a scalable folder structure, test your API thoroughly using Postman, and get ready to add a real database in future posts.
Let’s pick up where we left off and take your API development skills to the next level!
1. Basic Error Handling in Express
Even with a well-structured API, things can (and will) go wrong — maybe the client requests something that doesn’t exist, or maybe there’s an internal issue with the server. That’s why error handling is crucial.
In this section, we’ll cover:
- Handling requests to unknown routes (404 errors)
- Setting up a global error handler
- Understanding Express’s error-handling flow
Handling Unknown Routes (404)
Let’s say your server only handles /users and /products, but someone tries to access /orders. Instead of crashing or staying silent, your API should clearly respond with a 404 Not Found.
At the end of your route definitions, add a “catch-all” route like this:
// 404 handler (should be the last route)
app.use((req, res) => {
  res.status(404).json({ message: 'Route not found' });
});This middleware runs only if no other route matched.
As we mentioned in part 1 : The order of middleware in Express matters — middleware is processed in the order it’s defined, so this catch-all handler must come last, after all other route definitions.
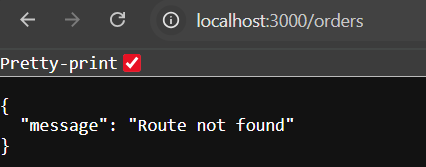
To verify that your 404 middleware is working correctly, you can test it using a tool like Postman, Insomnia, or even your browser.
For example, if your server only handles /users and /products, try requesting an undefined route such as:
GET http://localhost:3000/ordersYou should receive a response like this:
Adding a Global Error Handler
Sometimes, things break. A database might fail. A controller might throw an exception. Instead of handling errors individually in every route, Express gives you a way to define one centralized error-handling middleware.
Here’s how you can set it up:
// Global error handler
app.use((err, req, res, next) => {
  console.error(err.stack); // Log the error for debugging

  res.status(500).json({
    message: 'Something went wrong on the server.',
    error: err.message, // You can remove this in production
  });
});🔸 Express knows it’s an error handler because it has four arguments:
(err, req, res, next).
If any part of your route logic throws an error (synchronously or via next(err)), it will get caught here.
Simulating an Error
If you want to test your error handler, you can create a dummy route like this:
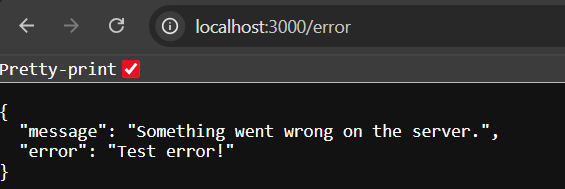
app.get('/error', (req, res) => {
  throw new Error('Test error!');
});When you visit http://localhost:3000/error, you should get a 500 response and see the error details as follows :
How It All Flows Together
Now that we’ve discussed route handling, 404s, and global error handlers, let’s take a step back and visualize how the entire request-response cycle flows through our Express app — from middleware to routing to error handling.
- Express tries to match the request to your defined routes.
- If none match → 404 middleware sends a “Route not found” message.
- If a route throws an error → global error handler catches it and sends a 500 response.
Here’s a simplified breakdown of what happens when a request hits your server:
🔁 Middleware & Error-Handling Flow in Express
Incoming HTTP Request
         │
         ▼
🔹 Middleware: express.json()
         │
         ▼
🔹 Middleware: logger (custom or morgan)
         │
         ▼
🔹 Route Handlers (GET, POST, PUT, DELETE, etc.)
         │
         ├── If route found & successful → ✅ Send response
         │
         ├── If route not found →
         │         ▼
         │    🔸 404 Middleware
         │         res.status(404).json({ message: 'Route not found' })
         │
         └── If route throws error →
                   ▼
              🔸 Global Error Handler
                   res.status(500).json({ message: 'Something went wrong' })
2. Project Structure and Folders
Before we dive into writing more code, let’s talk about project organization.
As your API grows, managing everything inside a single file like index.js becomes messy and hard to maintain. A clean, consistent folder structure makes your code easier to read, scale, and debug.
Example Folder Structure
Here’s a simple structure to guide you:
/project-root
│
├── /routes       # Define API endpoints and route handlers
├── /controllers  # Handle the business logic for each route
├── /middleware   # Custom middleware functions (if needed)
├── /config       # Configuration files (e.g., database, environment variables)
├── index.js      # Main server file to setup and start the Express app
└── package.json  # Project metadata and dependencies
This layout follows a separation of concerns principle — each folder has a clear responsibility. We’ll walk through how to fill in these folders shortly.
What Goes Where?
- routes/: This folder contains files where you define your API routes. For example,
users.jswould define routes related to user operations like/users,/users/:id, etc. - controllers/: Controllers hold the functions that contain the logic for each route. This separation helps keep routes clean and focused on just handling requests and responses.
- middleware/: If you write any custom middleware — for example, to handle authentication, logging, or error handling — you can keep those functions here.
- config/: Place configuration-related code here, such as database connection settings or environment variable management.
- index.js: The entry point of your application. Here, you set up Express, load middleware, import routes, and start your server.
Applying This in Our Project
In our example, we’ll break things down as follows:
- User routes will go into the
routes/folder. - Each route’s logic (like fetching or returning users) will be handled in the
controllers/folder. - Middleware functions like the request logger, 404 handler, and global error handler will go into the
middleware/folder.
To make this structure work, each module must export its functionality (using module.exports) and then be imported where needed — usually in index.js. For example, after exporting a route or middleware from its file, we can import it into index.js to wire everything together.
Let’s walk through what each part looks like.
✅ /routes/users.js
const express = require('express');
const {
  getAllUsers,
  getUserById,
} = require('../controllers/usersController');

const router = express.Router();

router.get('/', getAllUsers);
router.get('/:id', getUserById);

module.exports = router;✅ /controllers/usersController.js
const users = [
  { id: 1, name: 'Alice' },
  { id: 2, name: 'Bob' },
];

exports.getAllUsers = (req, res) => {
  res.json(users);
};

exports.getUserById = (req, res) => {
  const user = users.find(u => u.id === parseInt(req.params.id));
  if (!user) {
    return res.status(404).json({ message: 'User not found' });
  }
  res.json(user);
};✅ /middleware/logger.js
const logger = (req, res, next) => {
  console.log(`${req.method} ${req.originalUrl}`);
  next();
};

module.exports = logger;✅ /middleware/notFound.js
module.exports = (req, res) => {
  res.status(404).json({ message: 'Route not found' });
};✅ /middleware/errorHandler.js
module.exports = (err, req, res, next) => {
  console.error(err.stack);
  res.status(500).json({
    message: 'Something went wrong on the server.',
    error: err.message,
  });
};✅ Updated index.js
const express = require('express');
const userRoutes = require('./routes/users');
const logger = require('./middleware/logger');
const notFound = require('./middleware/notFound');
const errorHandler = require('./middleware/errorHandler');

const app = express();

// Built-in middleware
app.use(express.json());

// Custom middleware
app.use(logger);

// Routes
app.use('/users', userRoutes);

// Fallback middleware
app.use(notFound);
app.use(errorHandler);

// Start server
const PORT = process.env.PORT || 3000;
app.listen(PORT, () => {
  console.log(`Server running on port ${PORT}`);
});Thanks to this modular structure, our index.js is now much more organized, clean, and readable. It only focuses on wiring the different parts of the app together — middleware, routes, and server startup — while all the actual logic lives in separate files. This makes the app easier to scale and maintain.
After refactoring, your project directory might now look like this:
/project-root
│
├── /routes
│   └── users.js               # Defines user-related API routes
│
├── /controllers
│   └── usersController.js     # Logic for user route handlers
│
├── /middleware
│   ├── logger.js              # Custom request logger (from Part 1)
│   ├── notFound.js            # 404 handler middleware
│   └── errorHandler.js        # Global error handler middleware
│
├── index.js                   # Main application entry point
└── package.json               # Project metadata and dependencies
When Should You Refactor?
For small projects or quick prototypes, keeping everything in one file is perfectly fine. But as your application grows, separating concerns into different files and folders will save you headaches in the long run. It makes the code easier to navigate, debug, and maintain.
Why Use This Folder Structure?
This modular layout helps separate concerns and significantly improves long-term maintainability. It allows you to:
- Reuse logic across different routes through controllers and middleware
- Keep files small and focused, making them easier to test and update
- Add new features (like logging, validation, or authentication) without bloating your core logic
- Onboard new developers faster thanks to a clear, modular layout
This kind of structure keeps your codebase organized and scalable — a must as your API grows in size and complexity.
3. Testing the API with Postman
In Part 1 of this series, we tested our API’s GET routes directly in the browser to quickly verify that they work. At that time, we mentioned that testing POST, PUT, and DELETE requests requires a tool like Postman since these involve sending data and more complex requests.
Now, it’s time to complete our CRUD operations testing by using Postman to verify all routes—including creating, updating, and deleting data—work as expected. Testing your API ensures that your routes behave as expected, return the right responses, and handle errors properly.
What is Postman?
Postman is a popular API testing tool that allows you to send HTTP requests and inspect responses with an intuitive interface. It supports all HTTP methods, custom headers, authentication, and even automation workflows.
You can download Postman from https://www.postman.com/downloads/.
Where Does the Data Come From?
As we discussed earlier in the Controller section, this project uses a simple in-memory array to simulate a data source. For demonstration purposes, the user data is defined directly inside the usersController.js file like this:
const users = [
  { id: 1, name: 'Alice' },
  { id: 2, name: 'Bob' },
];This array is then used by the controller functions to handle requests. For example, the getAllUsers function returns the full list, while getUserById looks up a user by ID and returns it if found:
- GET requests read from this array and return the current list of users.
- POST requests add new users to the array.
- PUT requests modify existing users inside the array.
- DELETE requests remove users from the array.
💡 Since this is an in-memory array, the data is not persistent — if you restart the server, any changes made via POST, PUT, or DELETE will be lost. Later in future posts , we’ll connect this API to a real database for persistent storage.
Preparing to Test Your Routes with Postman
Before we dive into testing each route, here’s a quick checklist to get Postman ready:
1- Start your server Run your API server locally using :
npx nodemon index.js2- Open Postman and create a new request
3- Select the HTTP method you want to test (GET, POST, PUT, DELETE).
4- Enter the request URL For example:
http://localhost:3000/users5- For POST and PUT requests, add a JSON body Click on the Body tab, select raw and choose JSON format, then input your data for example :
{ "name": "John Doe", "email": "john@example.com" }6- Send the request and inspect the response Postman will show the status code, response body, and headers.
Now, let’s test each CRUD route separately. For each one, I’ll show you the request details, what to expect in the response, and how to verify it in Postman.
For all the following requests, the testing steps in Postman will be similar: you’ll change the HTTP method, URL, and optionally the request body depending on the operation. The process will look like this for each
Prerequisites for Each Request
Each HTTP method will require:
- A route definition in
routes/users.js - A controller function in
controllers/usersController.js
We’ll walk through each of these step-by-step in the sections below.
1. GET Request
📄 Route (routes/users.js)
router.get('/', userController.getAllUsers);📄 Controller (controllers/usersController.js)
const users = [
  { id: 1, name: 'Alice', age: 25 },
  { id: 2, name: 'Bob', age: 30 }
];

exports.getAllUsers = (req, res) => {
  res.json(users);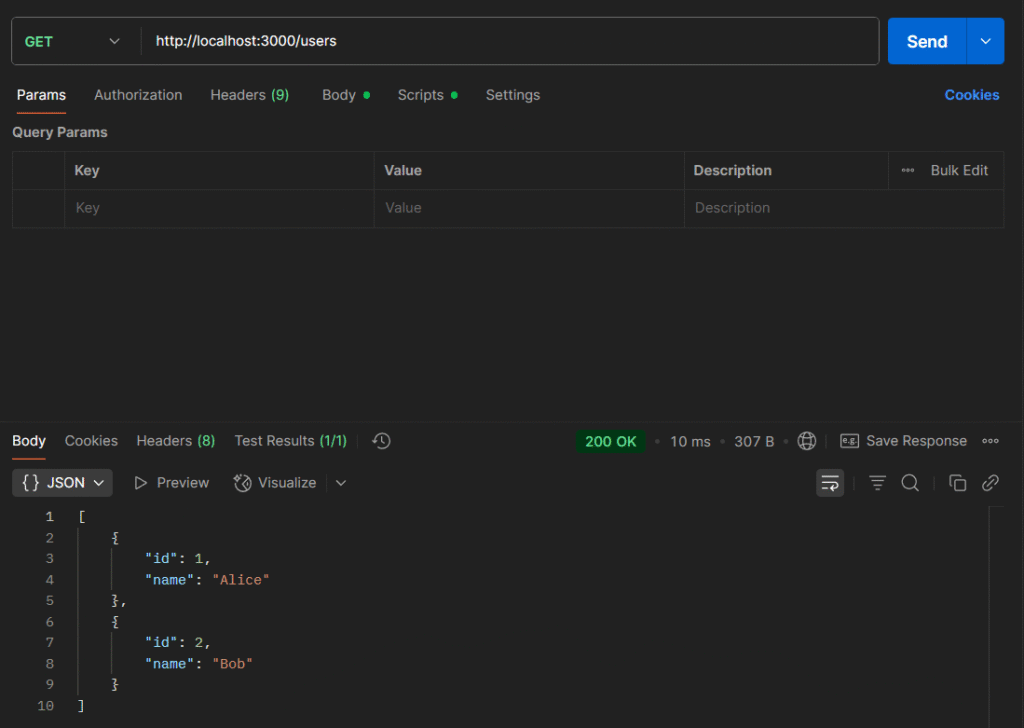
};URL: http://localhost:3000/users
Description: This request retrieves a list of all users stored in the API. It’s a simple read operation that does not require a request body.
How to test this in Postman:
- Open Postman and create a new request.
- Select GET as the HTTP method.
- Enter the URL
http://localhost:3000/users. - Click Send.
What to expect:
- You should receive a response with status code 200 OK.
- The response body will be a JSON array containing user objects.
- This confirms that your API’s GET route is correctly fetching data.
Postman response:
2. POST Request
📄 Route (routes/users.js)
router.post('/', userController.createUser);📄 Controller (controllers/usersController.js)
let users = [
  { id: 1, name: 'Alice'},
  { id: 2, name: 'Bob'}
];

exports.createUser = (req, res) => {
  const newUser = {
    id: users.length + 1,
    ...req.body
  };
  users.push(newUser);
  res.status(201).json(users);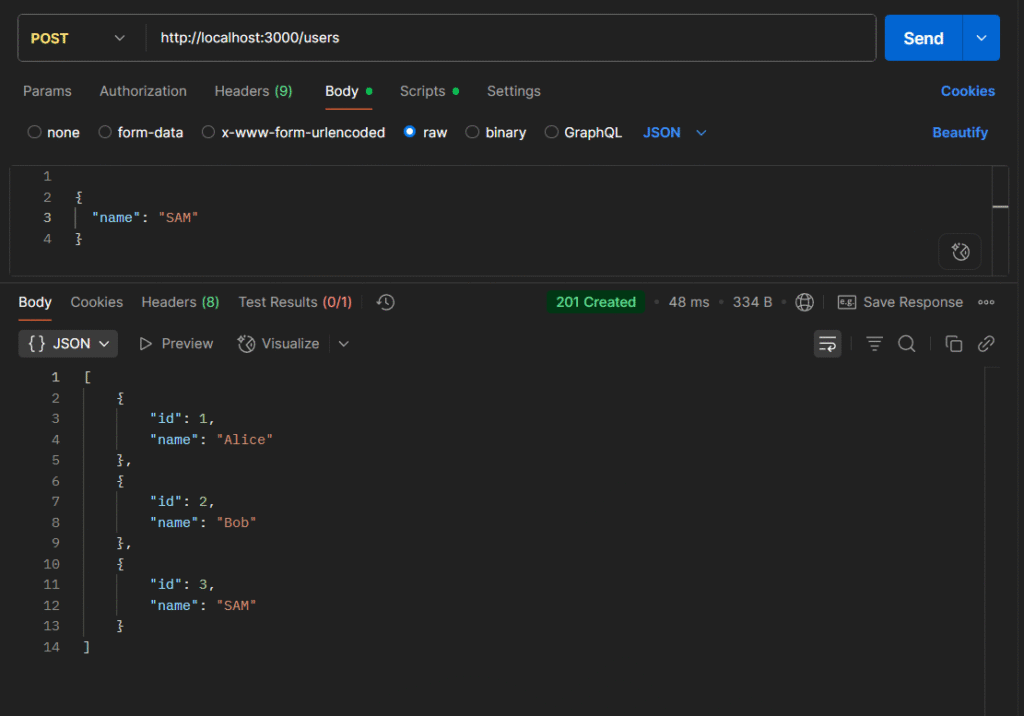
};URL: http://localhost:3000/users
Description: This request adds a new user to the database. It requires sending user data in JSON format within the request body.
How to test this in Postman:
- Open Postman and create a new request.
- Select POST as the HTTP method.
- Enter the URL
http://localhost:3000/users. - Go to the Body tab.
- Select raw and choose JSON from the dropdown.
- Enter the JSON data for the new user, for example:
{
  "name": "SAM"
}- Click Send.
What to expect:
- You should receive a response with status code 201 Created.
- The response body will include the newly created user’s details, usually with an assigned ID.
- This confirms that your API’s POST route is correctly handling data creation.
Postman response:
3. PUT Request
📄 Route (routes/users.js)
router.put('/:id', userController.updateUser);📄 Controller (controllers/usersController.js)
exports.updateUser = (req, res) => {
  const user = users.find(u => u.id === parseInt(req.params.id));
  if (!user) {
    return res.status(404).json({ message: 'User not found' });
  }

  user.name = req.body.name || user.name;

  res.json({ message: 'User updated successfully', user });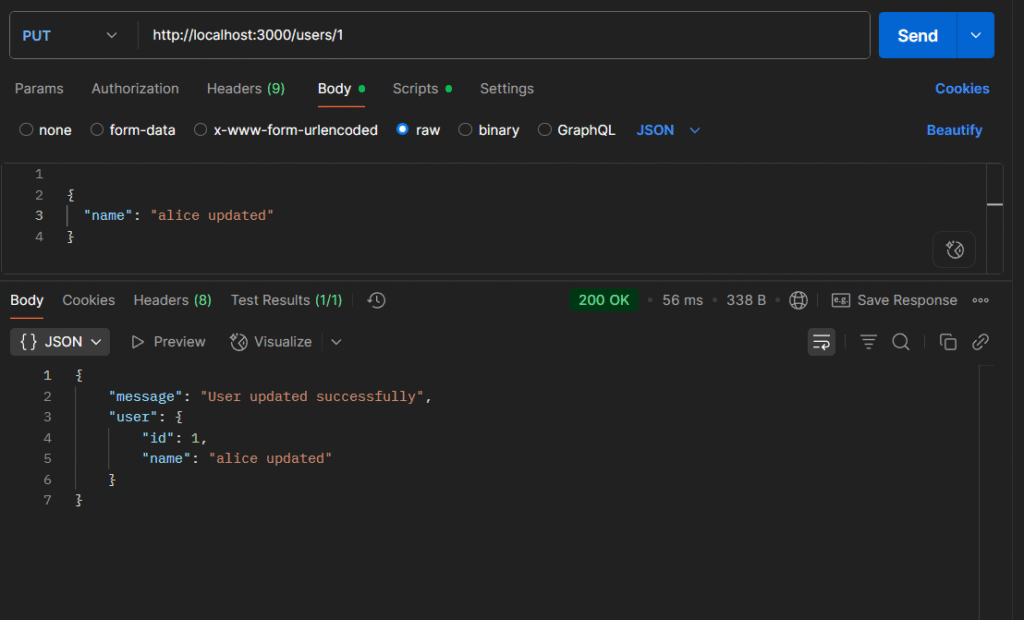
};URL: http://localhost:3000/users/1
Description: This request updates the details of an existing user identified by the ID in the URL (123 in this example). You need to send the updated user data as JSON in the request body.
How to test this in Postman:
- Open Postman and create a new request.
- Select PUT as the HTTP method.
- Enter the URL with the user ID you want to update, for example:
http://localhost:3000/users/1 - Go to the Body tab.
- Select raw and choose JSON from the dropdown.
- Enter the updated user data in JSON format, e.g.:
{
  "name": "Alice Updated",
}- Click Send.
What to expect:
- You should receive a response with status code 200 OK.
- The response body usually contains a confirmation message or the updated user details.
- This confirms that your API’s PUT route successfully updated the user.
Postman response:
4. DELETE Request
📄 Route (routes/users.js)
router.delete('/:id', userController.deleteUser);📄 Controller (controllers/usersController.js)
exports.deleteUser = (req, res) => {
  const userIndex = users.findIndex(u => u.id === parseInt(req.params.id));
  if (userIndex === -1) {
    return res.status(404).json({ message: 'User not found' });
  }

  users.splice(userIndex, 1);
  res.json({ message: 'User deleted successfully' });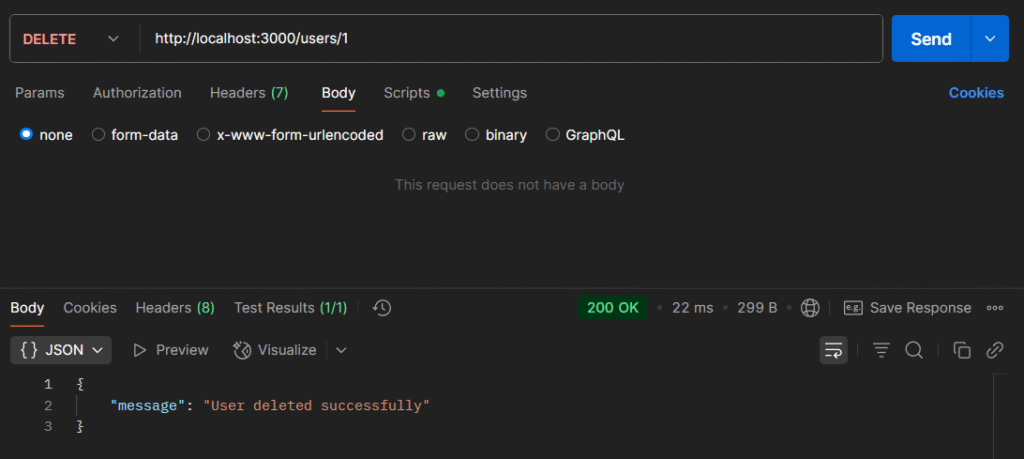
};URL: http://localhost:3000/users/1
Description: This request deletes an existing user identified by the ID in the URL (123 in this example).
How to test this in Postman:
- Open Postman and create a new request.
- Select DELETE as the HTTP method.
- Enter the URL with the user ID you want to delete, for example:
http://localhost:3000/users/1 - You don’t need to add a body for DELETE requests.
- Click Send.
What to expect:
- You should receive a response with status code 200 OK.
- The response body usually contains a confirmation message indicating successful deletion.
- This confirms that your API’s DELETE route correctly removes the specified user.
Postman response:
By testing all these routes, you confirm your API’s functionality and that it handles requests and responses as expected.
Conclusion
Congratulations! By following this tutorial, you’ve successfully built a fully functional RESTful API using Node.js and Express. You now have a solid foundation, including:
- A basic Express server set up and running
- Middleware for parsing JSON, enabling CORS, and logging requests
- Well-structured routes handling GET, POST, PUT, and DELETE HTTP methods
- Dynamic route parameters and query string handling
- Proper JSON responses with appropriate HTTP status codes
- Basic error handling to manage invalid routes and server errors
- Thorough testing of your API endpoints using Postman
With all these essentials in place, your application is ready to move beyond in-memory or hardcoded data. The next logical step is integrating a real database like MongoDB, allowing you to store, update, and retrieve persistent data.
In upcoming tutorials, we’ll explore how to connect your Express server to MongoDB, model data with Mongoose, and enhance your API with full CRUD functionality backed by a database. This will make your API production-ready and capable of handling real-world applications.
If you haven’t already, be sure to check out Part 1 of this series where we covered setting up your development environment, building a basic Express server, and mastering essential middleware and routing concepts.
Stay tuned and get ready to take your REST API to the next level!